The Thumb-Under Technique
The thumb-under technique involves moving the thumb under the fingers at some point in the scale so that you can start again with the thumb.
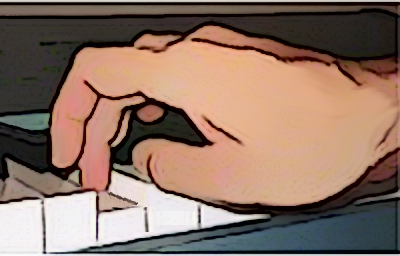
If you have been following these lessons from the beginning then you may remember that the first lesson in piano taught the importance of using curved fingers when playing.
One of the advantages of curved fingers is that it makes room for the thumb-under technique.
You can review that lesson here: Tips for Playing Piano.
Notice how the fingers are curved so that there is room underneath to move the thumb.
As you move your thumb underneath, you should also move your wrist to the right so that the thumb does not have to move very far under your fingers.
The technique is a mixture of thumb movement and wrist movement so that the thumb can easily reach under to the next note.
If you are struggling to understand this technique then it is recommended that you seek help from a skilled pianist.
C Scale
Right Hand
For the C scale the thumb moves under the fingers as the third finger plays so that the thumb can play the fourth note of the scale.
This allows the rest of the scale to be completed using the remaining fingers.
In the following example, TU shows where the thumb-under technique occurs.
1
2
3
TU
1
2
3
4
5
If you want to play a two or more octave scale, the thumb can reach under the fourth finger to start the next octave.
etc.
1
2
3
TU
1
2
3
4
TU
1
2
3
TU
1
2
Going Down the Scale
To go down the scale use the exact same fingerings in reverse.
When you reach your thumb you simply reach over with the correct finger to continue the scale.
etc.
5
4
3
2
1
TU
3
2
1
TU
4
3
2
1
TU
Left Hand
The left hand uses the same fingerings as the right hand only in reverse.
Notice how the two hands compare in the music below.
1
2
3
TU
1
2
3
4
5
5
4
3
2
1
TU
3
2
1
1
2
3
TU
1
2
3
4
5
5
4
3
2
1
TU
3
2
1
Both Hands Together
Once you can play the scale with each hand separately, you should practice both hands together.
Playing the scales with the two hands going in the opposite direction, like above, is easiest, since both hands will use the same fingerings.
Once you have mastered playing the scale in opposite directions, then practice with both hands going in the same direction.
This is much harder because the two hands will use different fingerings.
Pay carefull attention to where the thumb-under technique occures in each hand.
With enough practice, this will become second nature.
1
2
3
TU
1
2
3
4
5
5
4
3
2
1
TU
3
2
1
5
4
3
2
1
TU
3
2
1
1
2
3
TU
1
2
3
4
5
Are All Scales the Same?
Wouldn't it be wonderful if all scales where played using the same fingerings? But no. Sorry.
We will begin by practicing the scales that use this pattern.
In both major and minor, the C, G, D, A, and E keys use this pattern for both hands.
We will look at the remaining keys in a later lesson.
The Next Exercise
In the next exercise you will play the scales using just one hand at a time.
To really master the scales, you are encouraged to practice on your own with both hands.
As we get further into these exercises, it is becoming more and more important that you practice using a MIDI keyboard connected to a laptop or desktop computer.
This will allow you to practice the correct fingerings.
You are highly encouraged to use this set up if you really want to learn to play the piano correctly.